Setting a Custom Splash Screen
To upload a custom splash screen place a file named splash.bmp in the root directory of the SD Card in drive 1 (left hand slot).
Make sure the image file is of the correct size and format as detailed below.
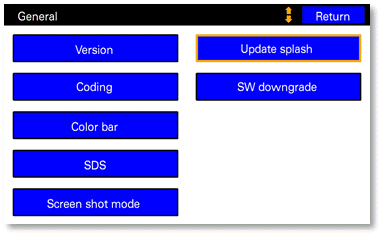
Select the Update Splash option from the Engineering Menu General screen.
Your RNS-E will reboot and the new splash screen should be displayed in place of the default.

Removing a Custom Splash Screen
Remove the SD Card from drive 1 (left hand slot) and/or remove the splash.bmp file from the root directory.
Select the Update Splash option from the Engineering Menu General screen.
Your RNS-E will erase the currently programmed start screen and reboot.
The default splash screen will have been restored.
Supported Splash Screen Format
The splash.bmp file must be a 32bpp uncompressed bitmap file.
The image size must be exactly 400x240 for the 192 RNS-E, or 800x480 for the 193 RNS-E.
If you attempt to upload a new splash screen, but no image is displayed on reboot, then either the splash.bmp file is not present, or it is not to correct size or format.
Splash Screens Gallery
User Jay has very kindly produced some custom 193 splash screens for a couple of Audi model variants which don't have official screens.
Click on the images to download them...
User and graphics designer George (Ace of Pixels) has very kindly produced some RS4 screens for the 193.
Click on the images to download them...
If you'd like to have a go at creating your own OEM style splash, then here's a little something to get you started.
Preparing 32bpp Bitmaps Using GIMP
If you want to create your own splash.bmp images in the correct format you can use GIMP.
To save an image as 32bpp bitmap format...
- File > Export As...
- Select File Type > Windows BMP Image
- Export
- Advanced Options > 32 bits > X8 R8 G8 B8
Additionally, for best results, you should first dither your artwork to ARGB1555.
Here is a tutorial and a GIMP plugin to achieve that.


